
Garage Organization Tips (That Actually Work!)
Let’s talk about your garage. For many families, it’s the most overlooked, most cluttered space in the home… and yet, it holds so much potential.
Maybe it’s packed with empty Amazon boxes, random bins from your last move, kids’ bikes, and holiday decorations you haven’t touched since December. Or maybe you’ve tried organizing it in the past, but it just didn’t stick. If you feel like your garage is out of control (or just a little “off”), you’re not alone. And you don’t need to overhaul it in a weekend to make meaningful progress.
As a professional home organizer and Certified Occupational Therapist, I help women simplify their spaces without overwhelm. I believe organizing should feel empowering — not exhausting — and your garage is no exception.
I’ll walk you through a gentle, doable plan for garage organization (with some helpful tools you can find here) even if you’re short on time or energy. Let’s reclaim your garage, one step at a time.
Garage Organization Doesn’t Have to Take All Weekend
If you’ve been putting off your garage because you think it requires an entire Saturday and a full crew of helpers, I’ve got good news! It doesn’t. You can absolutely tackle your garage in 30 to 60-minute sessions, spread out over a few days or even weeks.
Whether you’re balancing work, kids, pets, or your own nervous system, the key is to start small and stay consistent.
Instead of “organize the garage” going on your to-do list, break it down into micro-goals:
👉🏼 Remove all the garbage
⛺️ Group camping gear together
🔧 Declutter the tool area
🏒 Label bins for sports gear
Each small win builds momentum. This method also works beautifully if you’re neurodivergent or tend to get overwhelmed by big, open-ended projects.
Step 1: Clear the Obvious Trash and Empty Boxes
Start with the low-hanging fruit: Walk through your garage with a few trash bags and a box cutter. Break down and recycle empty cardboard boxes, throw away broken or moldy items, and toss anything you instantly know is trash. You can also take those tangled extension cords that bulk up an area and use a cord reel to keep them compact and tidy. This step clears visual clutter and helps you feel like you’re already making progress.
If you only have 30 minutes to spare, just do this and call it a win! You’ll be surprised at how much lighter your garage already feels.
Step 2: Work Clockwise Around the Space
One of my favorite organizing techniques (especially in large or chaotic areas like garages) is to move clockwise.
Here’s how:
Pick a clear starting point, like the garage door or a corner, and work your way around the room in a circle. This creates built-in structure and keeps you from jumping around or losing track of where you were. It also helps you stay grounded if you get interrupted by life — which, let’s be honest, happens.
Pro tip: If you’re organizing in short sessions, mark your stopping point with painter’s tape or a sticky note so you know exactly where to pick up next time.
Step 3: Group Like Items Into Collections
As you sort through the garage, begin to group similar items together. This is where your brain starts to feel clarity, and where systems begin to take shape.
Create “mini zones” for things like:
- Camping gear
- Sports equipment
- Automotive supplies
- Shoes or boots
- Tools and hardware
- Backup pantry/household items
- Seasonal décor
Even if these zones aren’t permanent yet, having everything of one category in the same general area makes decluttering and containerizing easier in the next steps.
After determining what zones you’d like to have, consider some useful organizing tools. For bikes and sports equipment, this rack is great for bicycles, helmets and more while this stand is perfect for bulky golf bags and clubs. Tools, hardware and more would work well in a larger cabinet that doubles as a workstation. I also like these stackable bins for seasonal decor and miscellaneous items. And if your family has a lot of shoes, you will love this tall shoe organizer!
Step 4: Declutter What You Don’t Use or Love
Once you’ve grouped your items, take a moment to pause and evaluate.
Ask yourself:
- Do I actually use this?
- Does this item still work?
- Is it a duplicate?
- Does this fit my life now?
Be honest, but gentle with yourself. Just because something was expensive or once useful doesn’t mean it still deserves space in your home. If it’s no longer aligned with your lifestyle, let it go.
Don’t get stuck on the “maybe someday” pile. Let your present-day self — and your current needs — drive the decision-making.
Pro tip: If your garage is filled with donation items, consider partnering with a local cause that matters to you. In my own business, I collaborate with the Sherwood Library and bring all client donations there to support youth and adult literacy programs. Giving items a second life with purpose makes it easier to part with them.
Step 5: Contain Collections in Clear Bins
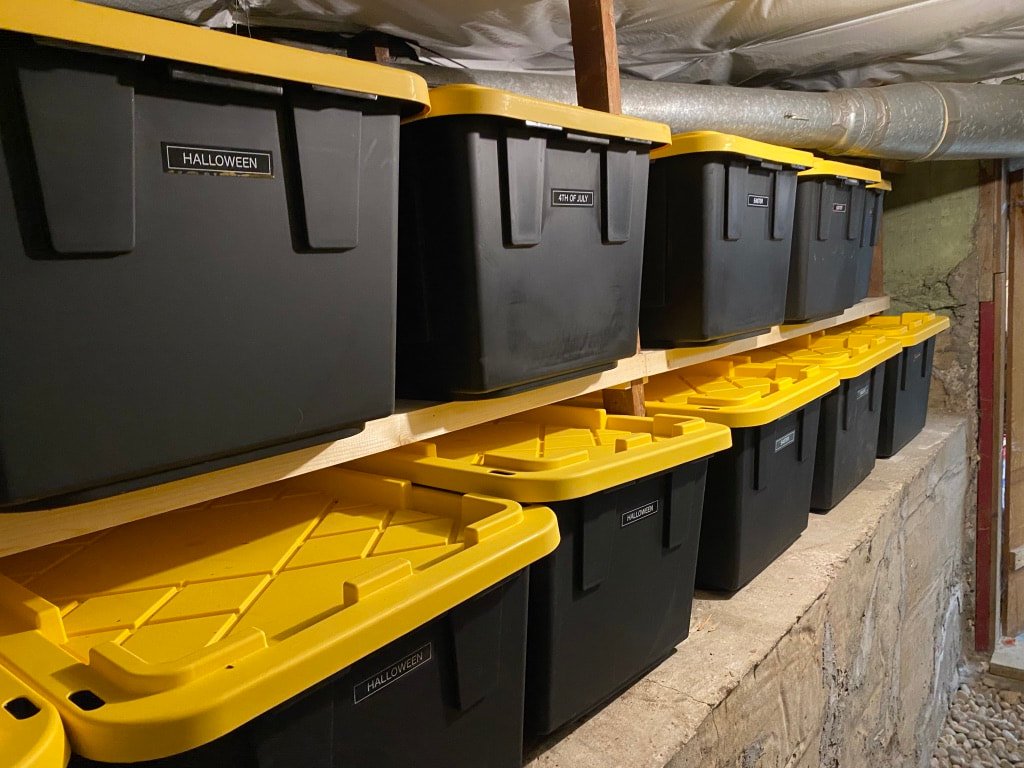
Now that you’ve decluttered, it’s time to contain your collections. I recommend using clear, sturdy bins with lids so you can easily see what’s inside without unstacking or opening every container. These heavy-duty bins are a great option!
Here’s why this works:
- Visual clarity (you won’t forget what you own)
- Dust protection (especially for gear stored long-term)
- Stackability (major space saver)
Make sure to label bins clearly and consistently, and keep it simple. (“Camping,” “Car Wash Supplies,” “Holiday Lights,” etc.)
Use painter’s tape and a Sharpie if you’re not ready to commit to a permanent label just yet. (If you are ready for a label maker, this is a fantastic choice.) Labels aren’t just for you – they help everyone in the household know where things live, which means less confusion and better maintenance.
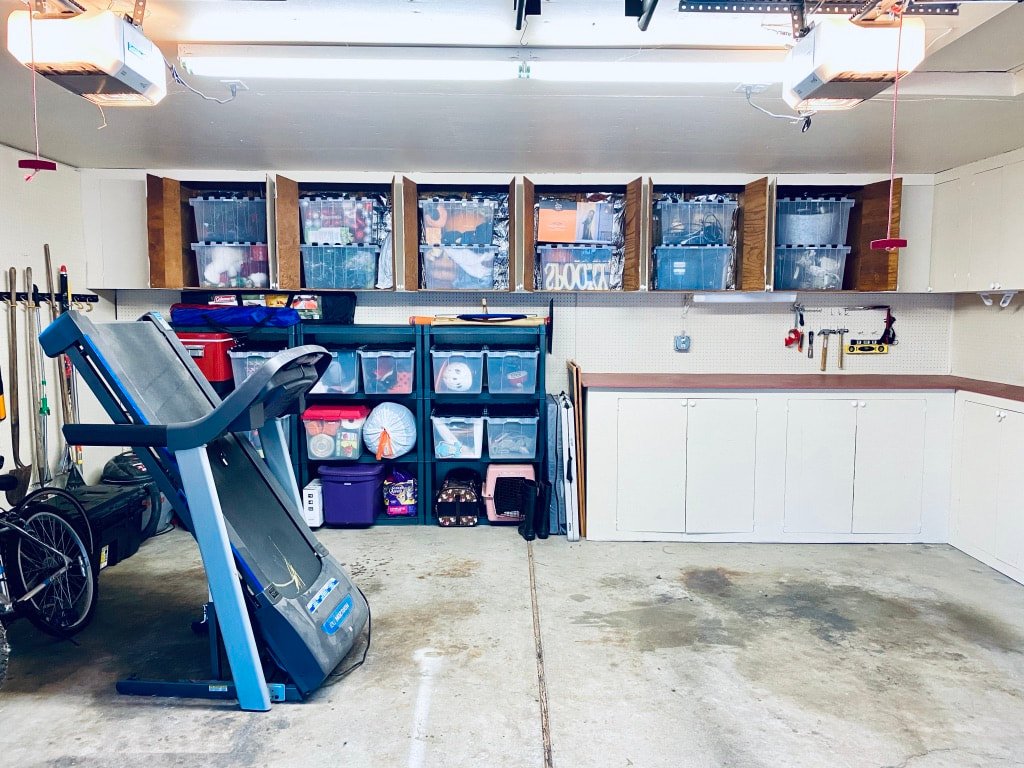
Bonus Tip: Store Frequently Used Items at Eye Level
If you’re storing shoes, reusable shopping bags, or tools you grab often, keep them at eye level or within easy reach. Save the high shelves and back corners for long-term storage like holiday bins or seasonal sports gear.
Don’t be afraid to use vertical space — install sturdy shelving, pegboards, or ceiling-mounted racks to get things off the floor and into view.
And please, please give yourself permission to toss the random screws in that old rusty coffee can. You’re allowed to let go of the “just in case” stuff!
Garage organizing isn’t about color-coded labels or matching bins. It’s about creating function and calm in a space that’s often been ignored. It’s about reclaiming your environment — not because you “should,” but because you deserve to feel supported by your space.
And if you have ADHD, are neurodivergent, or just burned out by decision fatigue, give yourself extra grace. You don’t need to be perfectly organized, just more aligned with what feels manageable and meaningful to you.
Ready for Help?
If your garage (or any part of your home) is making you feel stressed or stuck, you don’t have to tackle it alone. I offer in-home organizing sessions in Portland, Oregon and virtual sessions worldwide, and always with compassion, flexibility, and zero judgment.
I’ll help you make real, lasting progress at a pace that works for you.
Want to get started?
Book a free 20-minute Zoom consultation here
Just remember: Organizing your garage doesn’t have to be an all-or-nothing project. You can do it little by little, with clear steps and a plan that fits your energy.
Start with the trash. Work clockwise. Group, declutter, contain, and label. And most importantly… keep it real.
You’ve got this! And I’ve got your back if you need support.
xo,
Sarah Larsen
Home Organizer in Portland, Oregon